Daily Archives: 1st June 2013

Crochet 101 – Cup Holder

Cup holder

Note: This pattern is written in US terms, for UK terms, crochet a dc wherever an sc is mentioned.

Image

  • ch11

  1. sc in second ch from hook
  2. sc to end (10sc)
  3. *1ch turn, 10 sc in backloops of previous row
  4. Repeat from * 34 times
  5. Join with slip stitches to at end of rows

Fasten off!

Find coffee, use to stop hand from burning 🙂

Adjust pattern by reducing or increasing rows for a smaller or larger cup.

Crochet 101 – Single Crochet – How to

Single Crochet

Single Crochet, (abbreviated as sc) – US terms.

Double Crochet (dc) – UK terms

Start with a chain of your desired length (this is however many single crochet stitches you want to make, plus 1 extra chain stitch)

1. Insert hook in the second chain from the hook and yo

Image

2. Pull the loop you just made through the next one, yo again

Image

3. Pull the loop you just made through the other 2 loops. 

Image

You have completed your first single crochet stitch. Insert your hook in the next chain stitch to continue.

Image

Crochet 101 – Getting Started

Getting started

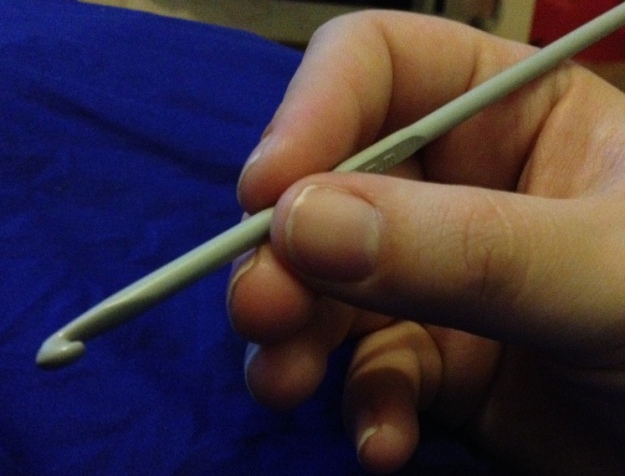
Holding the hook 

Most people hold the hook like a pencil, as shown below:
Image

Slip knot:

Crochet usually starts with a slip knot. To make one:

  • Make a loop of wool around your fingers
  • Pull a second loop through the first
  • Pull tight and adjust loop to the right size (to fit your hook)

Image

ImageImage


Chain Stitch: 

This is the most simple crochet stitch, but is an essential part of nearly all types of crochet.

Start with a slip knot.

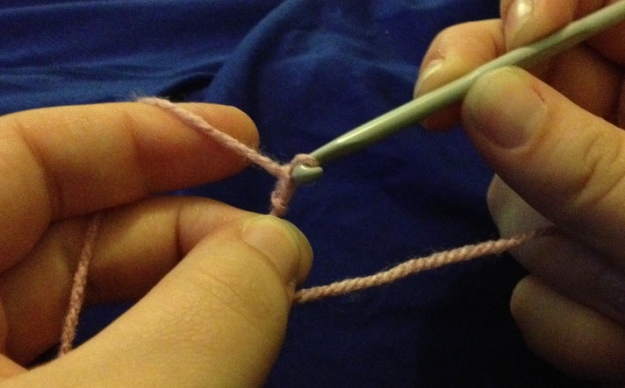
1. Loop the wool over the hook (yo)

You now have 2 loops on your hook 

Image

2. Pull the new loop through the original one

You are left with 1 loop, and have made 1 chain stitch
Image

Your finished chain should look similar to ‘finger knitting’ but more consistent, as using a hook means stitches should always be a similar size.

Image


Joining a chain with a slip stitch:


Push the hook through the middle of the first chain made


Make a loop of wool over the hook, and pull through the original loops, leaving the new loop on the hook and joining the start and end of the chain together, creating a circle.


Abbreviations:

Ch – chain stitch (eg 3ch means 3 chain stitches)

Yo (also written yoh) – Yarn over hook –looping the wool over the hook to create a new loop


Practicing chain and slip stitches – a Little Flower:

Start with a slipknot

  • Chain 15, and join with a slip stitch

  1. *(chain 7, miss 2 stiches, slip stitch in next stitch)

  2. repeat from * 4 times

 Fasten off


Crochet 101 – a bit of background

Crochet: An Introduction

Background

A brief history:

  • Crochet has historically been used to make both clothes and furnishings
  • The word crochet is believed to have come from the French word croc, meaning hook
  • Crochet is believed to have come from the middle east originally
  • In some parts of Scotland it is known as ‘shepherd’s knitting’
  • Lace style crochet is believed to have come from Italy in the 16th century
  • It was taught in Ireland, along with knitting and embroidery, in the early 19th century and became popular in America as people emigrated
  • Queen Victoria received gifts of Irish crochet lace and learnt how to crochet

Types:

  • Tunisian Crochet – This type of crochet uses very small stitches to produce a dense material, which can be patterned.
  • Broomstick Crochet -This type of crochet consists of crocheted ‘holes’ made using pins, with the size of the pin determining the size of the hole, to create an open fabric.
  • Filet Crochet – This is a type of imitation lace, which is usually patterned, using light and shade to create a design. This type of crochet is simple as it only uses 3 different stitches: chain, double and treble stitch, to create an open fabric consisting of square and empty spaces, known as bars and lacets.